


Oracle Fusion Applications 11.1.2.9 Installation Part 4 Installing Database for Oracle Identity Management and Oracle Fusion Applications Transaction Database
When determining your database configuration, consider the required instances, the required patching, listener configurations, schema and password requirements, and RCU directories.
Note:
Two databases are recommended for Oracle Internet Directory and Oracle Access Manager/Oracle Identity Manager because they are likely to have different configuration requirements. If desired, they can be combined into a single database.
Download p13390677_112040_Linux-x86-64_1of7.zip and unzipLogin to host dbnode01 with orafa usercd /u02/ofa_soft/11.2.4.0/database
./runInstallerProceed with the installation of your choice. There are no additional patchsets required for 11.2.0.4 database. Hence continue with below configuration
4.1 Minimum Initialization Parameters for Oracle Identity Management Database
Parameter | Value |
aq_tm_processes | 1 |
dml_locks | 200 |
job_queue_processes | 10 |
open_cursors | 1500 |
session_max_open_files | 50 |
sessions | 500 |
processes | 2500 |
sga_target | 512M |
pga_aggregate_target | 100M |
sga_max_size | 4G |
session_cached_cursors | 500 |
4.2 Preparing the Oracle Identity Management Database for the Oracle Fusion Middleware RCU
Execute the following commands to create XATRANS Views:
cd $ORACLE_HOME/rdbms/admin
sqlplus / as sysdba
@xaview.sql
4.3 Running the Oracle Fusion Middleware RCU for Oracle Identity Management
The Oracle Fusion Middleware RCU needs to be set up for the following components: ODS, OIF, OIM, OAM. You must use FA as the prefix for the schema names.
You must select a single password for all the schema while running the Oracle Fusion Middleware RCU.
Unzip the Oracle Fusion Middleware RCU zip file
Linux: REPOSITORY_LOCATION/installers/fmw_rcu/linux/rcuHome.zip
Start the Oracle Fusion Middleware RCU by issuing this command:
cd /u02/ofa_soft/installers/fmw_rcu/
mkdir rcu
unzip ../linux/rcuHome.zip
cd bin
./rcu

On the Welcome screen, click Next.

On the Create Repository screen, select the Create operation to load component schemas into a database. Then click Next.

On the Database Connection Details screen, provide the information required to connect to an existing database. For example:
Database Type: Oracle Database
o Host Name: Enter one of the Oracle RAC nodes. Enter the VIP address of one of the RAC database nodes or the database SCAN address, for example: DB-SCAN.mycompany.com
o Port: The port number for the database listener (DB_LSNR_PORT). For example: 1521
o Service Name: The service name of the database. For example OIDEDG.mycompany.com.
o Username: sys
o Password: The sys user password
o Role: SYSDBA
Click Next.

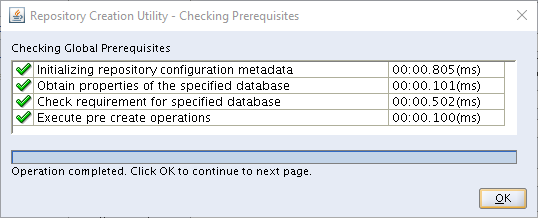
On the Check Prerequisites screen, click OK after the prerequisites have been validated.
On the Select Components screen, provide the following values:
Create a New Prefix: Enter a prefix to be added to the database schemas, for example, enter FA.
Components: Select the schemas shown in the following table:
Product | Oracle Fusion Middleware RCU Option | Service Name | Comments |
Oracle Internet Directory | Identity Management–Oracle Internet Directory | Oracle Fusion Applications Installation Workbook - Database tab -> IDM DB -> Service name (if not using a separate OID DB) OID DB -> Service Name (if using a separate OID DB) | |
Oracle Access Manager | Identity Management–Oracle Access Manager | Oracle Fusion Applications Installation Workbook - Database tab -> IDMDB -> Service name | Audit Services will also be selected. |
Oracle Identity Manager | Identity Management–Oracle Identity Manager | Oracle Fusion Applications Installation Workbook - Database tab -> IDMDB -> Service name | Metadata Services, SOA infrastructure, and User Messaging will also be selected. |
Oracle Identity Federation | Identity Management–Oracle Identity Federation | Oracle Fusion Applications Installation Workbook - Database tab -> IDMDB -> Service name |

Click Next.

On the Check Prerequisites screen, click OK after the prerequisites have been validated.

On the Schema Passwords screen, enter the passwords for the schemas. You can choose to use either the same password for all the schemas or different passwords for each of the schemas. Oracle recommends choosing different passwords for different schema's to enhance security
Click Next.

On the Map Tablespaces screen, accept the defaults and click Next.

On the confirmation screen, click OK to allow the creation of the tablespaces.

On the Creating tablespaces screen, click OK to acknowledge creation of the tablespaces.

On the Summary screen, the summary and verify that the details provided are accurate. Click Create to start the schema creation process.

On the Completion summary screen, verify that the schemas were created.
Click Close to exit.
4.4 Minimum Initialization Parameters for Oracle Fusion Applications Database
Parameter | DB Default Value | Recommended Value for Oracle Fusion Applications |
audit_trail | DB | NONE |
plsql_code_type | INTERPRETED | NATIVE |
nls_sort | Derived from NLS_LANGUAGE | BINARY |
_b_tree_bitmap_plans (Hidden Parameter. Use below command to change the value ALTER SYSTEM SET "_b_tree_bitmap_plans"=false SCOPE=SPFILE;) | TRUE | FALSE |
db_securefile | PERMITTED | ALWAYS |
_ACTIVE_SESSION_LEGACY_BEHAVIOR | FALSE | TRUE |
_fix_control (alter system set "_fix_control"= '5483301:OFF', '6708183:ON' scope=spfile;) | 5483301:ON,6708183:OFF | 5483301:OFF,6708183:ON |
Increase Redo Log Group | At-least three 2 GB |
4.5 Running the Oracle Fusion Middleware RCU for Oracle Fusion Applications
Create directories in the file system accessible by the database which will be referenced by the DBA directories used by Oracle Fusion Applications. These directories are specified in the Oracle Fusion Applications Installation Workbook - Database tab -> FA transaction Database table and they are:
Linux: REPOSITORY_LOCATION/installers/apps_rcu/linux/rcuHome_fusionapps_linux.zip
4.6 Make dmp Files Available on the Database Server
- Locate the file APPS_RCU_HOME/rcu/integration/fusionapps/export_fusionapps_dbinstall.zip.
- Unzip export_fusionapps_dbinstall.zip to the directory you specified for FUSIONAPPS_DBINSTALL_DP_DIR.
- Go to APPS_RCU_HOME/rcu/integration/biapps/schema and locate the otbi.dmp file.
- Copy otbi.dmp to OTBI_DBINSTALL_DUMP_DIR.
4.7 Running the Oracle Fusion Applications Repository Creation Utility using the Wizard
Start the Oracle Fusion Middleware RCU by issuing this command:
cd /u02/ofa_soft/installers/apps_rcu/
mkdir rcu
unzip ../linux/rcuHome_fusionapps_linux.zip
cd bin
./rcu
No action is necessary on this read-only screen. Click Skip this Page Next Time if you do not want to see it the next time you log in to the Oracle Fusion Applications RCU.

Click Next to continue.
Select Create to create and load component schemas into the database

Click Next to continue.
Specify the database connection details.

Click Next to continue.
Click OK

The Oracle Fusion Applications RCU retrieves the names of the Oracle Fusion Middleware and the Oracle Fusion Applications components. You cannot change the schema owner names. By default, all components are checked so that they are included in the prerequisite check process.
Click Next to begin the process.

Click OK prerequisite check process

Specify the passwords for main and additional (auxiliary) schemas. Passwords must have a minimum length of eight characters and contain alphabetic characters combined with numbers or special characters.
- Use same passwords for all schemas: Specify a single password for both schemas. Retype to Confirm.
- Use main schema passwords for auxiliary schemas: Specify a different password to use for each main schema and for the associated auxiliary schema. Only the main schemas are visible. Retype the password to Confirm.
- Specify different passwords for all schemas: Specify a unique password for each main schema and its auxiliary schema. All schemas are visible. Retype to Confirm.
Note the passwords you enter. You must supply them when you create a response file.
Click Next to continue.

Each Oracle Database directory object has a value represented by a physical directory on the database server. Custom variables are pre-defined, platform-specific directory objects that the Oracle Fusion Applications RCU creates. In the Value column, you specify a pre-existing physical directory (located on the database server) for each custom variable.
Click Next to continue.

If you want to start the tablespace create process without making any changes, click Next on this screen.

Click OK to create the tablespaces.

Click OK when the operation is complete.

Review the information and click Create. While the schemas are being created, the utility displays the Repository Creation Utility – Create screen, showing the creation progress.

The Logfile column lists log file names.
If errors are encountered during the Create operation, or if a Create operation fails for any component, the Cleanup for failed components checkbox appears on this page and is selected by default. If the checkbox is selected, the Oracle Fusion Applications RCU will perform cleanup operations for the components that failed.
Click Close to dismiss the screen.


